
A loose armrest fixing or damaged wheel should be found before a guest approaches water. An AY-ST-V1.0 floating armrest and wheel inspection should cover component condition, assembly, inflation instructions, seating, and today’s operating conditions. Record unresolved faults as a hold.
The AY-ST-V1.0 floating wheelchair has three wheels and detachable floating armrests. These features make its inspection different from a land-only chair. Use the current model manual alongside this checklist; a visual pass alone cannot establish buoyancy performance or authorize a water session.
Images are AI-generated illustrations based on product references. They do not document an actual inspection, factory visit, or project.
1. Which chair and instructions are being checked?
Match the physical chair with its asset number, model label, and assembly illustrations. Mixed fleets create easy mistakes: a wheel, armrest, or loose fixing may return beside another chair after cleaning. Colour helps staff find equipment but does not establish compatibility.
The current V1.0 manual identifies inflatable PVC armrests and wheels. Its installation drawings show separate front and rear assemblies. Compare these shapes before checking condition.
- Record asset ID and manual filename.
- Match both armrests with this chair.
- Confirm front-wheel and rear-wheel positions.
- Check whether any repair remains open.
A complete chair starts with a matched set of parts. Put unidentified components aside before assembly. Do not borrow a visually similar part simply because it fits through a hole. Record who last released any repaired assembly; a repair tag without a completed check leaves today’s inspector guessing.
Identity checks that prevent mix-ups
| Item | Comparison | Hold condition |
|---|---|---|
| Chair | Asset record and model label | Identity cannot be resolved |
| Armrests | Current assembly illustrations | Different attachment arrangement |
| Wheel assemblies | Front and rear reference views | Unidentified substitution |
| Repair record | Latest completed service entry | Open fault or missing release |
2. What can staff see before touching any adjustment?
Place an empty chair on firm, level ground with enough space around each side. Remove sand or debris that hides joints without dismantling an unfamiliar assembly. Walk around once before manipulating fittings; this preserves a clear view of damage as found.
Look for bent members, cracked surfaces, distorted brackets, and rubbing between components. Compare left and right sides where their designs match. A chair leaning visibly on level ground needs investigation, even when individual fasteners appear present.
- Photograph damage before cleaning changes its appearance.
- Examine connections around front-wheel installation.
- Look beneath seating and beside rear-wheel mounts.
- Check exposed edges near a guest’s hands or legs.
Visible distortion stops a routine release. Isolate a suspect frame and seek model-specific repair guidance. Keep cosmetic marks separate from deformation or cracks. The floating model overview helps with visual identification. Use supplied instructions for assembly details.
Distinguishing surface marks from structural concerns
| Finding | Follow-up observation | Immediate handling |
|---|---|---|
| Light surface mark | Photograph location and extent | Review against local acceptance criteria |
| Bent attachment bracket | Compare alignment without forcing | Hold chair |
| Crack or split | Record close and wider views | Hold chair |
| Debris obscuring a joint | Clean by approved method | Reinspect before release |
3. How should floating armrests be examined?
Inspect both armrests along their full visible surfaces, including undersides and attachment areas. Look for cuts, abrasion, abnormal distortion, or a change from their previous condition. A cover or label can hide damage, so record any area that cannot be checked.
The manual shows detachable armrests and separate securing steps. Follow those steps for this model. Do not treat an armrest as a convenient lifting handle or use extra force to make a misaligned connection close.
- Compare corresponding left and right shapes.
- Check each attachment against installation drawings.
- Examine valve and closure areas without improvised disassembly.
- Note recurring loss of shape or suspected air loss.
A suspect flotation component keeps this chair out of water. Tag the affected side and describe what changed. Request a replacement or repair decision before another session. A successful land roll cannot clear an armrest concern, and squeezing a component by hand does not establish its flotation capacity.
Armrest findings and next steps
| Observation | Detail worth recording | Decision |
|---|---|---|
| Cut or puncture suspected | Location and change over time | Hold for service review |
| Loose attachment | Which connection moves | Reassemble by approved instructions |
| Uneven shape | Side and comparison photograph | Investigate before water use |
| Closure damage | Valve or cap condition | Obtain service direction |
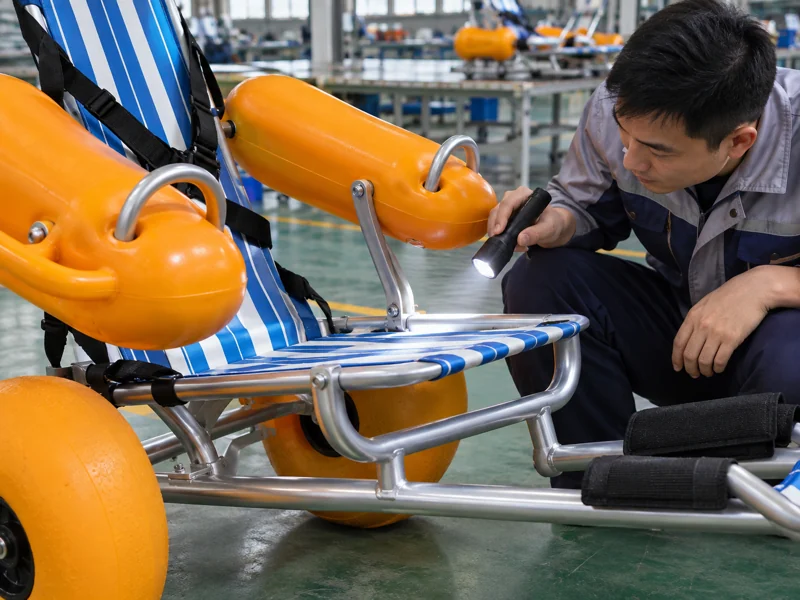
4. What should wheel and inflation checks include?
Inspect all three wheels, then examine their attachments and rolling behaviour. The smaller front assembly differs from rear assemblies; record wheel position when reporting a defect. “Damaged tyre” gives a supplier less useful information than a labelled photograph showing its location.
Use the pressure instructions for this exact model and fitted component. Do not transfer settings from another chair or a general beach balloon wheel listing. If a gauge cannot resolve the required range, obtain a suitable gauge before making an adjustment.
- Look for cuts, deformation, and valve damage.
- Confirm retention parts are present and seated.
- Observe rotation, rubbing, and unusual side movement.
- Record actual pressure readings where required.
Wheel condition and wheel attachment need separate answers. A sound tyre can still have an unsecured axle. Hold any wheel with unexplained drag, repeated air loss, or doubtful retention. Do not compensate for poor movement by increasing pressure beyond the applicable instruction.
Separate tyre faults from assembly faults
| Symptom | Check next | Release condition |
|---|---|---|
| Soft or distorted tyre | Inflation instruction and reading | Cause resolved and setting checked |
| Wheel rubs | Clearance and assembly position | Free movement restored |
| Wheel moves laterally | Axle and retention arrangement | Approved assembly confirmed |
| Recurring air loss | Valve and tyre service review | Fault repaired and rechecked |
5. Which seating and backrest details affect release?
Check fabric, stitching, attachment points, backrest adjustment, and the supplied belt. Look beneath cushions or fabric folds where accessible. Loose seating can be missed when inspection stops at the visible upper surface.
The manual illustrates adjustable back support and a seat belt. Confirm engagement using its instructions before anyone sits down. Do not infer an individual’s support needs from a successful mechanical check; equipment condition and personal suitability require separate decisions.
- Inspect load-bearing fabric and seams.
- Check attachment points around seat and back.
- Verify adjustment engagement before handover.
- Keep damaged belts or buckles out of use.
Seating must remain secure in its selected position. Stop when an adjustment slips or a fixing cannot be identified. Consult the manual library when checking supplied documents, then request clarification for unclear steps. Avoid adding straps, cushions, or attachments without checking their effect on the approved configuration.
Seating release points
| Area | Check | Reason for a hold |
|---|---|---|
| Seat fabric | Tears, seams, attachment condition | Load-bearing damage |
| Backrest | Selected position and engagement | Unintended movement |
| Belt assembly | Webbing, buckle, mounting | Damaged or incomplete assembly |
| Added accessory | Written compatibility confirmation | Effect on configuration unresolved |
6. How should staff verify pins, knobs, and connections?
Inspect each connection shown during assembly, including parts disturbed during transport or cleaning. Work around the chair in a fixed direction. This makes omissions easier to spot without requiring a long narrative for every normal fitting.
Check installed position rather than presence alone. A pin resting beside its hole, a loose knob, or a partially closed retainer can look complete from a distance. Use the manual’s intended engagement method; this article supplies no tightening torque or substitute hardware specification.
- Count required parts against assembly diagrams.
- Check retention after any refitting.
- Examine worn threads or distorted retainers.
- Keep removed parts in a labelled container.
Reassembly creates a fresh inspection point. Repeat affected checks whenever a component has been removed. Staff managing shared beach-access applications should assign that responsibility explicitly. A cleaning handover must say whether a chair remains assembled or still awaits its final connection check.
Connections disturbed by common tasks
| Previous task | Recheck area | Record needed |
|---|---|---|
| Wheel removal | Axle and retention | Wheel position and checker |
| Armrest removal | Mounting and securing parts | Both sides confirmed |
| Backrest adjustment | Engagement mechanism | Selected position |
| Storage disassembly | All rebuilt connections | Complete reassembly check |
7. What should an empty rolling check reveal?
After static checks pass, move the empty chair over a short, clear area on firm ground. Observe straight rolling, turning, wheel clearance, and unusual sounds. This is a functional screen; it cannot establish loaded stability or approve a water route.
Record when a problem appears. Rubbing only during a turn suggests a different investigation from constant drag during straight travel. Compare condition before and after movement, especially around recently refitted components.
- Walk slowly enough for clear observation.
- Check both turning directions where space permits.
- Stop at new noise, drag, or visible movement.
- Reinspect any connection affected by a finding.
A short roll should answer a specific mechanical question. Repeat only after the cause of a fault has been addressed. Avoid pushing harder until a sticking wheel moves. For wider program planning, beach-access project examples provide context; they do not replace this chair’s inspection results.
Record movement precisely
| Observation | Useful note | Response |
|---|---|---|
| Straight roll clear | Surface and route used | Continue remaining checks |
| Noise during turns | Direction and wheel location | Stop and inspect |
| Persistent drag | Whether present unloaded | Hold pending cause |
| Connection shifts | Exact joint and photograph | Hold and seek service guidance |
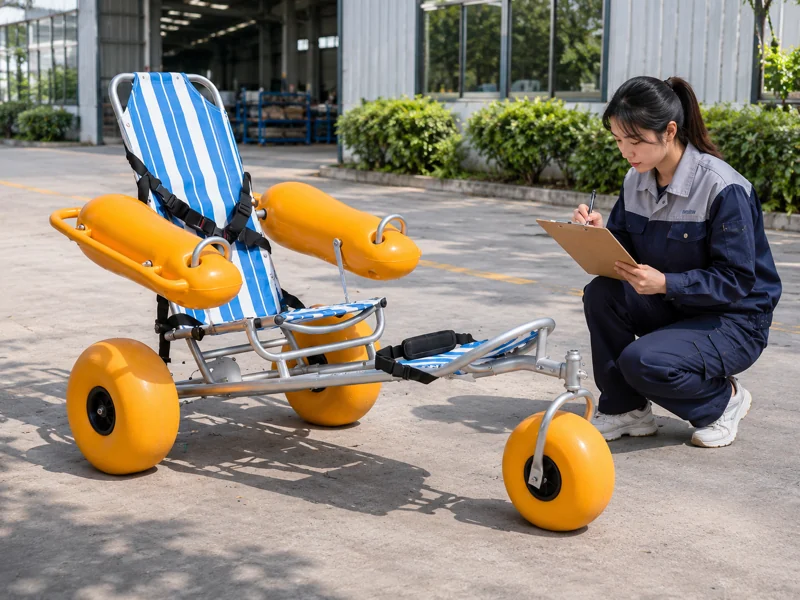
8. What must be checked before a water session proceeds?
Keep equipment release separate from today’s water decision. A mechanically acceptable chair may still be unsuitable for current wind, waves, currents, entry conditions, or available supervision. Use a site-approved operating plan and relevant local water-safety direction.
The V1.0 manual depicts calm-water conditions, supervision, and buoyancy aids. It does not supply a complete site rescue plan or numeric weather limits. Those details require competent local planning before operations begin.
- Confirm designated entry and exit locations.
- Review current conditions and site restrictions.
- Assign supervision and communication roles.
- Confirm required personal equipment and exit arrangements.
Today’s conditions can cancel a session after every component passes. Record your cancellation reason without changing the mechanical inspection result. A land-only model from the beach wheelchair range must never inherit floating-chair permissions through a shared checklist.
Two separate release decisions
| Equipment condition | Site condition | Operating decision |
|---|---|---|
| Inspection complete | Approved conditions and staffing | Follow authorized session plan |
| Inspection complete | Outside local limits | Cancel water session |
| Mechanical fault open | Conditions acceptable | Keep chair on hold |
| Configuration uncertain | Any condition | Resolve identity before use |
9. How should faults be isolated and closed?
Attach a visible hold tag and move affected equipment away from ready-to-use stock. Describe the fault in plain language, with its location and discovery time. “Left rear wheel rubs during a turn” describes a finding more clearly than “check wheel.”
Send clear photographs and model details through Ary Beach support when a repair method or part identity needs confirmation. Keep correspondence with the asset record so a later shift can see what was approved.
- Name the affected component and symptom.
- Record who reported and isolated it.
- Identify the agreed repair or replacement.
- Require a completed recheck before release.
A delivered replacement does not close a fault by itself. Verify installation and repeat relevant functional checks. If several chairs show the same problem, inspect potentially affected units and review shared assembly or handling practices before treating faults as unrelated.
Closing a fault record
| Stage | Required entry | Equipment status |
|---|---|---|
| Discovery | Symptom, asset, location, date | Held |
| Service decision | Approved action and responsible person | Held |
| Repair completed | Work and parts recorded | Awaiting recheck |
| Recheck completed | Results and release authority | Available only if cleared |
10. What should the final inspection record contain?
Use a short form staff can complete beside the chair. Include asset ID, model, inspection time, component results, actual measurements where required, and unresolved findings. Give “not checked” its own status; a blank box should never resemble a pass.
Separate equipment checking from session authorization when local procedures assign different responsibilities. Capture any change after inspection, including adjustment, disassembly, or replacement. Those changes may require another check before handover.
- Identify the inspected chair and current instructions.
- Record armrest, wheel, seating, and connection results.
- Link any fault record and completed corrective work.
- Record equipment release and session authorization separately.
The handover must show which decision remains open. Adopt one V1.0 form, trial it with staff, and revise ambiguous fields before routine use. Keep a completed example beside training materials, with personal information removed.
Q1: Can staff check inflation by squeezing an armrest?
Hand feel may reveal an obvious change, but it cannot replace the applicable inflation instruction or required pressure measurement.
Q2: Can a loose armrest be removed for a water session?
Do not change flotation configuration to work around a fault. Hold the chair until its approved configuration has been restored.
Q3: Does an empty rolling check prove water readiness?
It screens rolling and assembly faults only. Armrest condition, seating, site conditions, supervision, and operating authorization still require separate checks.
Q4: What should happen after a wheel has been refitted?
Recheck its attachment, retention, applicable inflation setting, and movement before releasing the chair.
Q5: Can yesterday’s inspection cover today’s session?
Use your current pre-use procedure. New damage, handling, adjustments, or changed water conditions require current checks and decisions.