
A beach access mat route acceptance inspection should follow the entire installed route, including its approach and endpoint. Check mat surfaces, joints, exposed edges, specified anchors and transitions against approved details. Record defects by location, close them and confirm operating responsibility before opening.
This process helps parks and resort teams organise acceptance. It does not establish a universal slope, anchor spacing or compliance result. Your offered beach mat system and approved site design must provide actual acceptance criteria.
Images are AI-generated illustrations based on product references. They do not document an actual inspection, factory visit, or project.
1. Which installation should the team inspect?
Confirm route identity, drawing revision and completed work limits before walking the site. A contractor may have installed a partial route or changed its endpoint after sand conditions shifted. Compare actual alignment with the approved plan and identify any variation.
Separate delivery records from installation records. A complete component shipment does not prove that every section was installed in its planned location. Check remaining stock, replacement sections and removed components where quantities differ.
- Mark start, finish and direction on a route plan.
- Identify approved installation details and revisions.
- List changes made during site work.
Inspect the route that was built. Update your plan with actual locations before recording defects. Keep proposed changes separate until reviewed by the responsible person.
Use mat installation planning information for project orientation. Start acceptance with a joint walk-through by installation and operations staff so location descriptions agree.
Installation identity record
| Record | Compare with site | Resolve before acceptance |
|---|---|---|
| Route plan | Actual alignment and endpoint | Unapproved changes |
| Component schedule | Installed section arrangement | Unexplained substitutions |
| Detail drawings | Connections and terminations | Missing or changed details |
| Work completion record | Areas actually finished | Partial or unfinished sections |
2. What should be checked along the approach?
Begin before the first mat section. Inspect how users reach the route from existing access, including obstructions, loose material and changes in level. Follow the approved approach detail and record its actual condition.
Look at both arrival and return movement. A connection can appear straightforward from one direction while presenting a different problem in reverse. Staff should also confirm that any required waiting or assistance area remains available.
- Inspect the connection with existing access.
- Check clear space around the entrance.
- Compare installed start-edge treatment with its detail.
Start inspection before reaching any mat section. An obstruction on the approach can prevent use even when every installed section looks correct. Assign such findings to the appropriate site team.
For services involving beach wheelchairs, identify intended equipment within your route review. Do not use product-category labels as proof of compatibility. Record approach measurements at their marked locations.
Approach review
| Location | Inspect | Record |
|---|---|---|
| Existing access | Obstructions and surface condition | Location photograph |
| Entrance area | Space required by approved arrangement | Actual layout |
| Start edge | Finished connection and movement | Detail reference |
| Return approach | Reverse-direction connection | Any different condition |
3. How should mat surfaces and supporting sand be examined?
Walk the full route while observing surface condition and how sections rest on their supporting surface. Look for damage, displaced sections, folds, raised areas or local loss of support. Use the installation instructions when deciding what condition is acceptable.
Inspect after any permitted cleaning that improves visibility. Debris may hide a damaged surface or obstruct a joint. Record sand buildup separately from damaged material because corrective work may involve different teams.
- Locate damaged or displaced mat sections.
- Identify debris and sand accumulation.
- Record changes in support beneath the route.
Locate each finding before someone starts correcting it. A photograph without a route position can be difficult to use across a long installation. Mark section number and direction in your notes.
Ask operations staff whether their planned inspection method reaches every section. Where access itself becomes unsafe, restrict the area and arrange an appropriate assessment rather than continuing a trial.
Surface defect locations
| Observation | Location detail | Next assessment |
|---|---|---|
| Damaged mat material | Section and affected area | Repair or replacement method |
| Raised or folded area | Extent and surrounding condition | Installation or support issue |
| Sand buildup | Section and approach direction | Approved removal method |
| Local loss of support | Area and adjacent changes | Substrate and installation review |
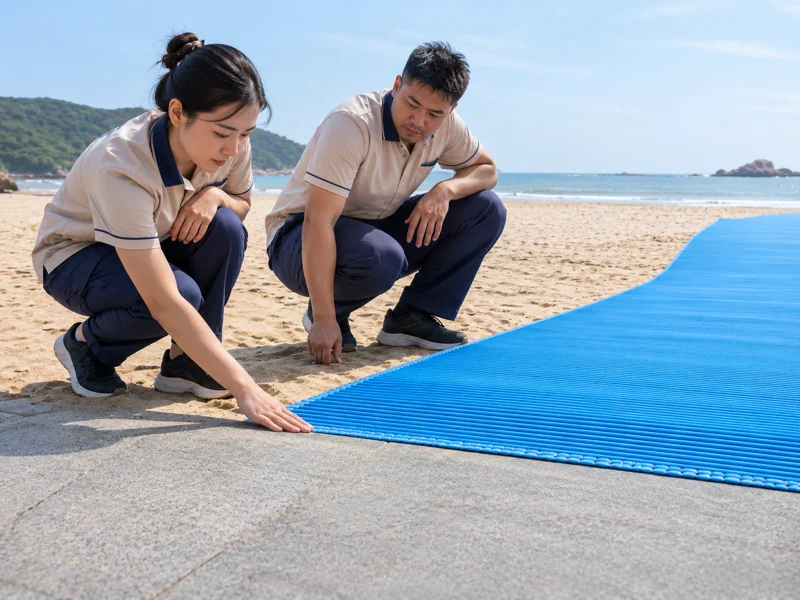
4. What makes a joint ready for acceptance?
Check each joint against the offered system’s approved connection detail. Look for correct alignment, complete engagement and intact components. Confirm that staff can identify the joint type and its intended finished condition.
Review connections after adjacent sections have been positioned correctly. Moving one section may affect several joints. If correction changes neighbouring alignment, repeat checks through that affected area rather than signing off only one connector.
- Identify missing or damaged connection components.
- Examine separation, lifting or displacement.
- Record the joint reference and adjoining sections.
Accept a connection in its installed position. A connector shown loose on a workbench does not prove correct engagement on sand. Ask installers to demonstrate the specified inspection method.
Keep a close photograph of an accepted representative joint with the operating file. Our beach mat project page provides planning context; your own approved detail remains the inspection reference.
Joint acceptance record
| Joint item | Compare against | Record if unresolved |
|---|---|---|
| Component identity | Approved connection schedule | Incorrect or unknown part |
| Engagement | Installation instructions | Location and incomplete feature |
| Alignment | Finished joint detail | Displacement or separation |
| Adjacent sections | Approved layout | Area affected by correction |
5. How should exposed edges and anchors be reviewed?
Follow both sides of the route, including turning areas and endpoints. Check edge condition and specified anchor locations against approved installation details. Identify protruding, missing, displaced or damaged components.
Observe surrounding sand and public movement areas. Changes beside a mat can expose hardware or leave an edge unsupported. The inspection must reflect current conditions, even when an earlier installation photograph showed a different profile.
- Inspect exposed perimeter sections.
- Compare anchor locations with the approved plan.
- Record hardware condition and surrounding support.
Check what users can contact from either side. A route may attract people approaching outside its designated entrance. Record exposed features requiring correction before opening.
Send system-specific questions through Ary Beach project support. Do not substitute anchor types or change placement during acceptance without the required review. Reinspect surrounding sections after approved correction.
Edge and anchor review
| Area | Condition to examine | Correction record |
|---|---|---|
| Side perimeter | Damage, lifting or unsupported edge | Section and approved remedy |
| Anchor location | Installed position and condition | Plan reference and finding |
| Turning area | Exposed edges around direction change | Layout and photographs |
| Endpoint perimeter | Termination and contact hazards | Final detail comparison |
6. What should be checked at turns and the endpoint?
Compare turning and waiting areas with the approved layout. Check that they remain usable after installation and that nearby items do not reduce planned clear space. Record any service equipment, signs or furniture placed there.
Follow movement through your endpoint and back onto the return route. Confirm that users reach the destination described in visitor information. A mat ending at an unplanned obstruction cannot fulfil an agreed access route.
- Check direction changes and planned clear areas.
- Inspect endpoint surface and termination.
- Confirm a workable return arrangement.
A route needs a usable return path. Ask operating staff to describe how visitors leave their destination and where assistance is available. Correct gaps before publishing opening information.
Include the intended beach walker service where applicable in your review. Its presence does not replace project-specific geometry checks. Photograph endpoints from both directions.
Destination review
| Route feature | Acceptance question | Required record |
|---|---|---|
| Turn | Does actual layout match approved space? | Measurements and plan location |
| Waiting area | Is planned space unobstructed? | Current arrangement |
| Endpoint | Does it reach the stated destination? | Termination photograph |
| Return movement | Can the approved return procedure operate? | Operating method and findings |
7. How should a controlled route trial be organised?
Complete physical inspections and resolve defects before conducting an approved route trial. Define equipment, participants, assistance, conditions and stop rules in advance. A trial should examine intended movement without asking participants to compensate for known defects.
Observe approach, joints, turns and return movement. Record conditions at each location. A successful trial supports your recorded scenario; it does not prove performance for every device, person or future sand condition.
- Identify the scope and responsible trial lead.
- Record observations by route location.
- Stop when movement or surface behavior becomes uncertain.
Keep trial results narrower than the conditions tested. If only one arrangement was assessed, describe that arrangement. Additional services may need separate review.
Coordinate the trial with your broader accessibility applications and local operating procedure. Add participants’ practical feedback without publishing identifying or health information in general maintenance records.
Route trial observations
| Trial segment | Observe | Record context |
|---|---|---|
| Approach | Connection and entry movement | Direction and surface condition |
| Main run | Movement along installed sections | Equipment and assistance |
| Joints and turns | Contact, clearance and section behavior | Exact location |
| Endpoint and return | Planned turnaround and departure | Procedure used |

8. Which defects should prevent public opening?
Keep affected access closed when damaged mat sections, unresolved joint separation, raised edges, exposed anchors or unsuitable transitions remain. Record the actual defect and its location. Decide whether a safe, approved alternative exists through your site’s normal process.
Do not rely on a warning sign as the only response to a physical defect. Visitors need accurate information and controlled access while corrective work occurs. Coordinate barriers or closure arrangements with site operations.
- Identify each defect affecting intended movement.
- Assign a corrective action and responsible person.
- Reinspect after the work is complete.
A repair closes only the defect it resolves. Replacing a section may disturb its neighbours, connections or anchoring. Include those areas in the recheck.
Use Ary Beach support information when defining a supplier escalation route. Keep site closure authority with your named local role and document each decision.
Opening hold register
| Finding | Area to hold | Recheck after correction |
|---|---|---|
| Damaged section | Affected route segment | Replacement and adjoining joints |
| Separated joint | Connection and adjacent sections | Engagement and alignment |
| Raised edge | Relevant perimeter area | Edge condition and support |
| Exposed or displaced anchor | Contact area | Approved placement and surrounding sand |
| Unsuitable transition | Approach or endpoint | Corrected detail and movement review |
9. Who should own checks after acceptance?
Name an operating owner before opening. That person or role needs current drawings, inspection instructions and a clear repair route. Installation acceptance should hand over a working maintenance process alongside physical equipment.
Set inspection frequency through your site’s approved plan and product instructions. Define additional checks after events that may change conditions, including significant weather, sand movement, maintenance work or a reported problem. Avoid assuming a previous acceptance remains valid indefinitely.
- Identify routine inspection responsibility.
- Set escalation and closure authority.
- Confirm storage and removal arrangements where relevant.
Handover includes the next inspection. Record when it is due and what conditions trigger an earlier review. Keep enough information for another shift to locate an emerging problem.
Multi-site operators can coordinate asset records across their beach-access projects. Maintain separate route condition records because exposure and maintenance needs differ between locations.
Operating handover
| Handover item | Named recipient | What they need |
|---|---|---|
| Route configuration | Operations lead | As-installed plan and details |
| Routine checks | Inspection team | Location system and criteria |
| Defect escalation | Duty/site lead | Closure and repair contacts |
| Seasonal handling | Maintenance lead | Removal, storage and reinstallation instructions |
10. What should the opening decision contain?
Record the route inspected, date, responsible reviewers and conditions observed. List completed corrections and remaining restrictions. Confirm that unresolved defects do not prevent the intended opening arrangement and that operating staff have accepted their duties.
Update public information alongside the physical route. Maps, service descriptions and staff briefings should describe the available destination and current arrangement. If only part of a planned installation has been accepted, state that limit clearly.
- Attach the final route plan and defect closeout.
- Confirm operating ownership and next inspection.
- Record the authorised opening decision.
Open the accepted route described in your records. A later extension or relocation needs its own review. Keep your opening file accessible so staff can compare future conditions with the accepted installation.
Walk from existing access through your endpoint once more with the duty lead. Resolve any difference between the written handover and what staff will operate that day.
Q1: Does delivery acceptance mean the route may open?
No. Delivery checks address supplied components. Opening follows installed-route inspection, defect resolution and operating handover.
Q2: Should every joint receive attention?
Inspect each joint under the applicable system instructions and approved plan. A representative photograph does not replace route-wide checking.
Q3: Can staff substitute anchors during inspection?
Seek the required technical approval for component or placement changes. Then update records and inspect the revised installation.
Q4: What if overnight sand movement changes a released route?
Apply your event-triggered inspection procedure. Reassess affected sections before relying on the earlier acceptance.
Q5: Does a successful trial prove compliance for all users?
No. It records observations within a defined trial. Project applicability and wider access requirements need their own review.